Psoas and Piriformis - Understanding these Deep Hip Muslces
The Piriformis and the Psoas (or Iliopsoas if we include the Iliacus) Muscles are key causes of stiffness and tightness in the hips when restricted, and this impingement can often refer up to the lower back and causes problems there.
When I work with people in 121 environments, and in yoga classes, I see time and again people who have reasonably good movement elsewhere completely locked up in these muscles.
The following article gives a little background to the muscles, and provide some great illustrated stretches that you can do a few times a week to keep this area healthy and mobile.
Introducing and Stretching the Piriformis
The Piriformis Muscle
The piriformis is a muscle that extends from the front of the sacrum. That's the triangle-shaped bone between your two hipbones in your pelvis. The muscle extends across the sciatic nerve to the top of the femur (which is, as you know, the large bone in your upper leg). The piriformis helps the thigh move side to side. Specifically, the piriformis laterally rotates the femur with hip extension and abducts the femur with hip flexion.
A tight piriformis leads to difficulty in moving in the hip region and becomes a contributing factor in back pain. It can also lead to something called “piriformis syndrome” where it irritates the sciatic nerve.
Below are two positions that stretch the piriformis in the same way, but with a different relationship to gravity.
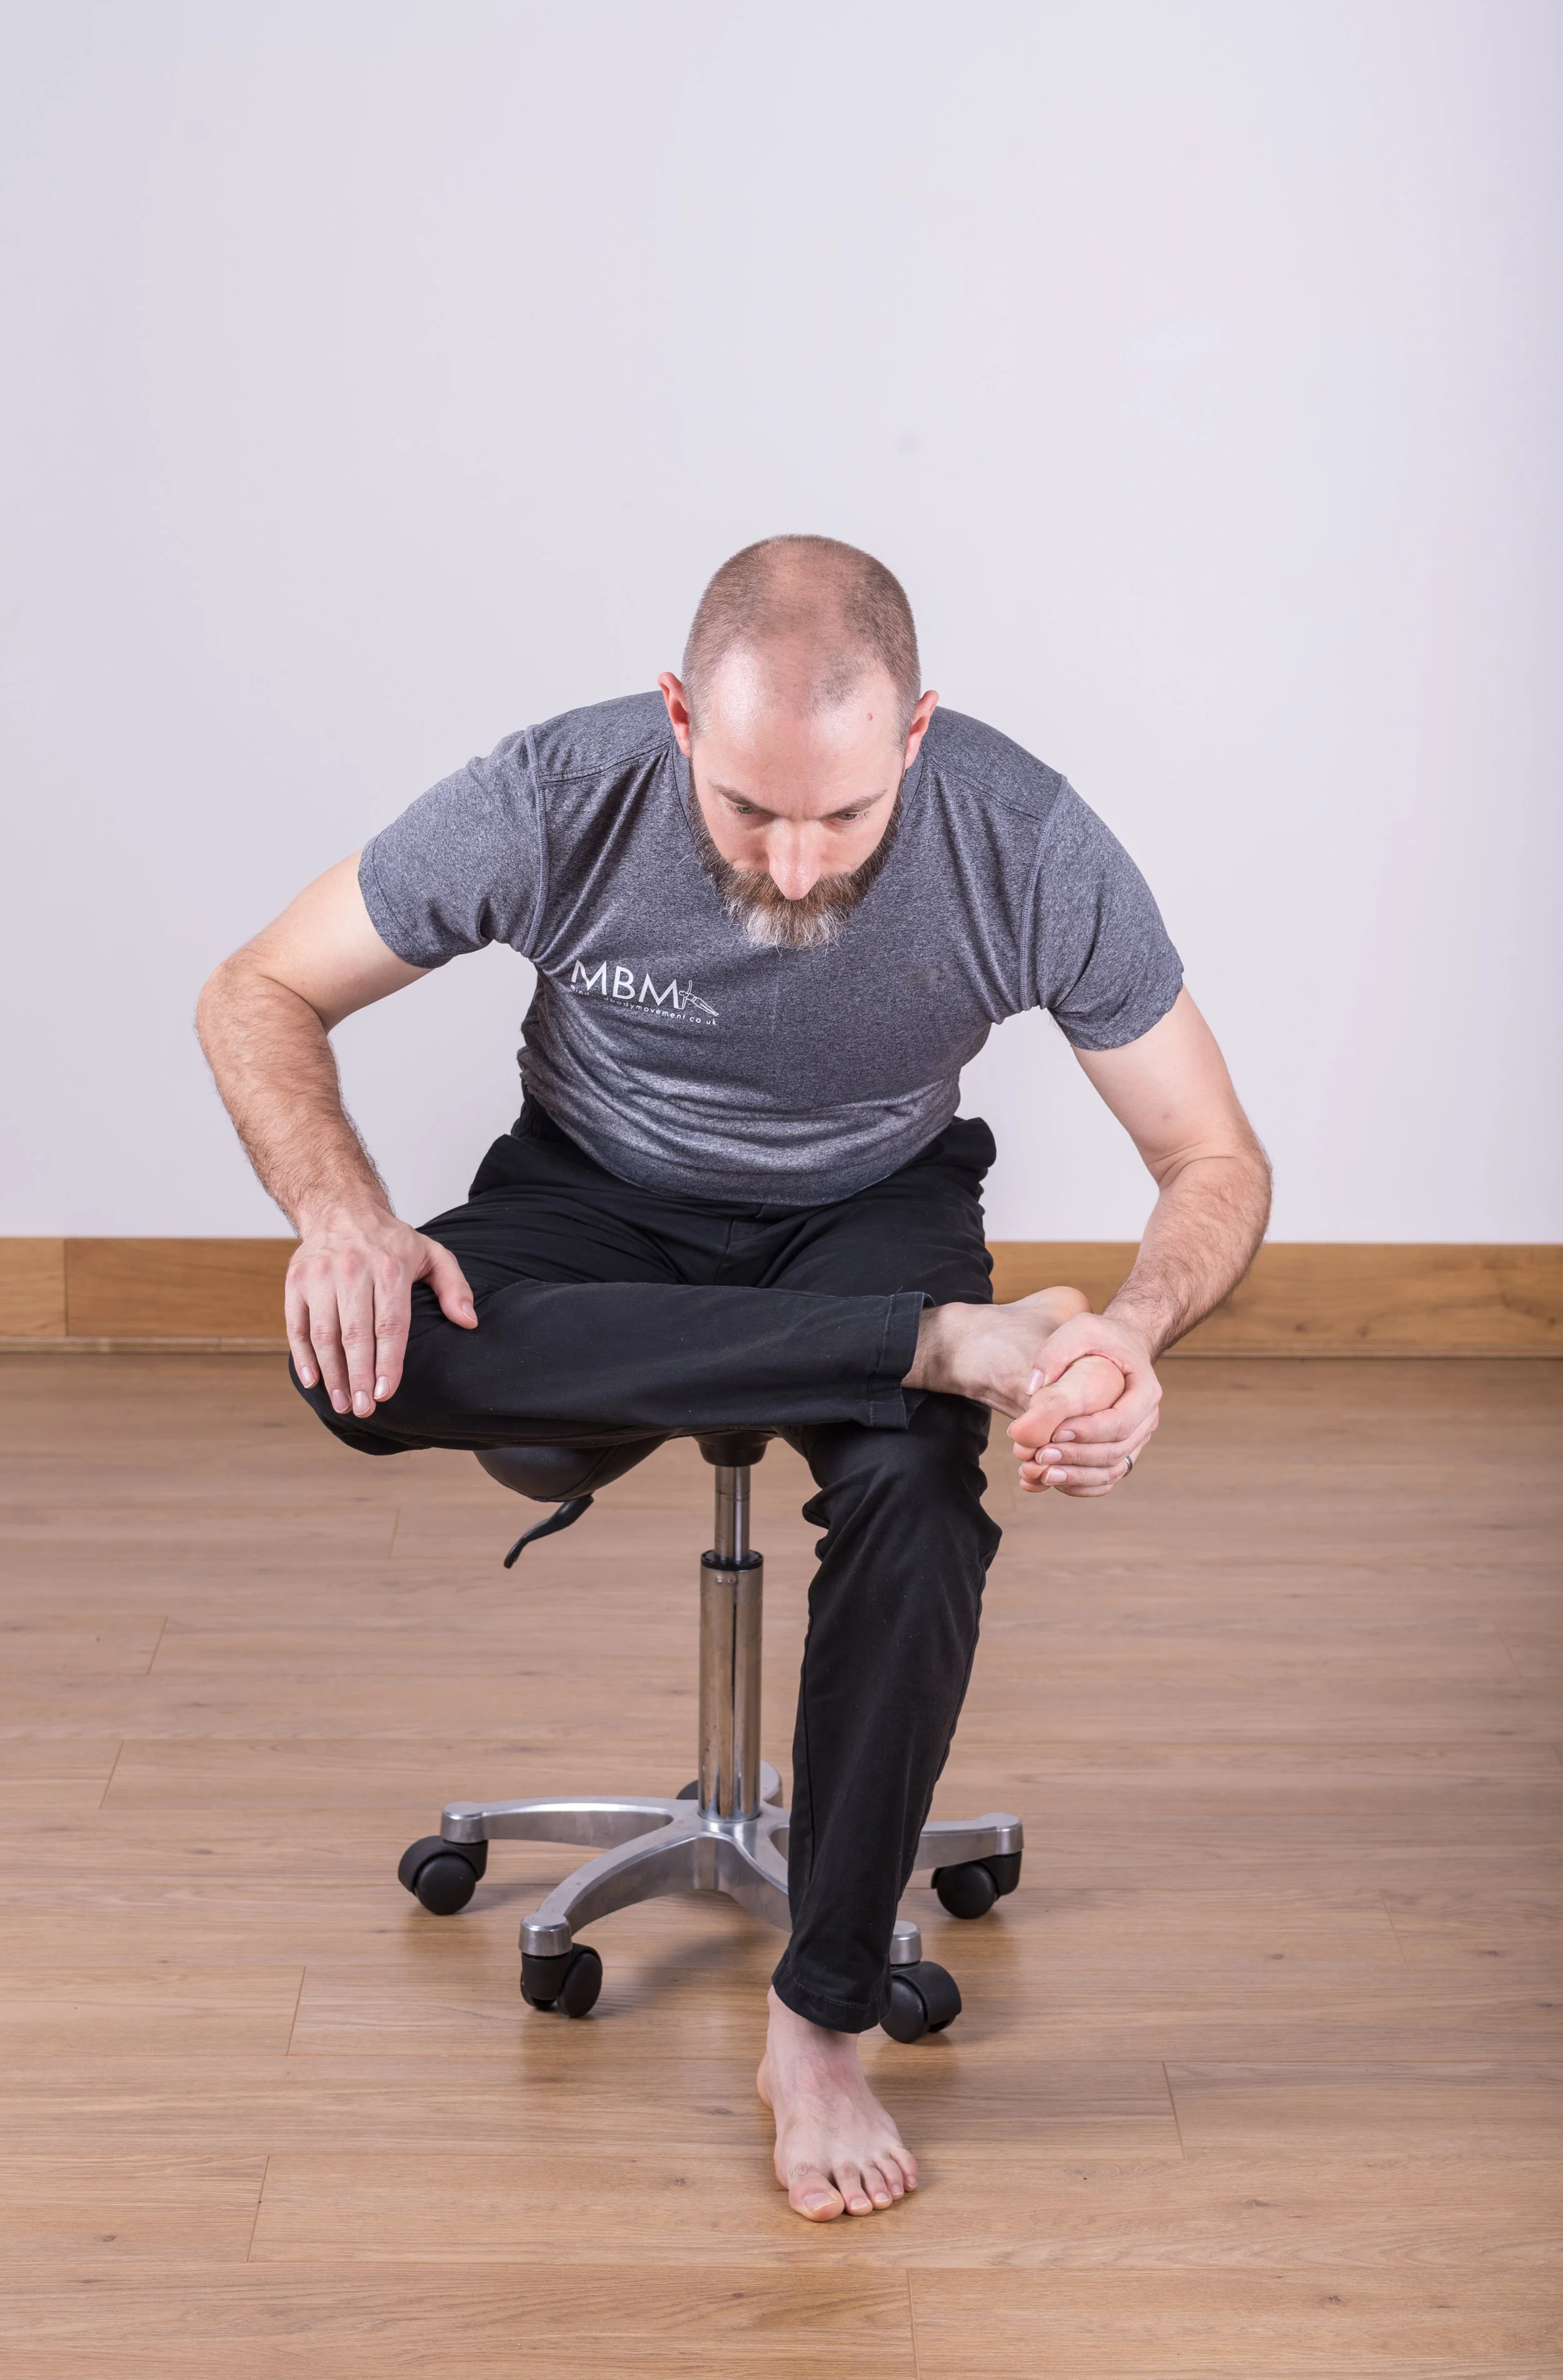
Seated Piriformis Stretch
Sitting on a chair or other support, draw one foot up to rest on the thigh of the other leg.
Support the raised legs with the hands, press the hip since the floor lengthening the spine, and if possible gently fold forward over the leg.
If comfortable, apply gentle pressure to the knee to lower it down.
Hold the position for 30 to 45 seconds on each side, breathing slowly.
Laying Piriformis Stretch - (Eye of the Needle)
Lay on your back in semi-supine (feet on the floor knees up). Bring one foot to rest on the front of the thigh of the other.
Reach the hands through the extended leg and interlace the fingers behind the thigh, or take the clothes if more comfortable. A strap/towel can be used here if it’s difficult to take the position comfortably while keeping the shoulders on the floor.
Explore this position slowly, and then to gently apply more stretched draw the shoulders towards the ears.
Hold the position for 30 to 45 seconds on each side.
What about Pigeon Pose?
Any yoga practitioners reading might be thinking “but what about Pigeon pose?”, My teacher always says that is a piriformis stretch? Well, the teacher certainly will if they are me, because it is. :-) In fact, Pigeon is the same leg position we have in both stretches above; but lying face down. So, we have a different relationship both to gravity, and to our body weight.
It’s that second element that is the reason that I haven’t included it as a recommendation here on the blog. Not because it’s not a great stretch, because it is. I’m not included it because if you’ve not done the position before it is stronger on the body and it can put more pressure on the knee than the versions I’m showing you.
It is a pose that I would rather show somebody in person, to make sure they are doing it well and safely. That should always be an overriding concern!
Introducing and Stretching the Psoas
Psoas (and Iliacus) Muscles
The psoas joins the upper body and the lower body. As part of the iliopsoas, psoas major contributes to flexion in the hip joint. On the lumbar spine, unilateral contraction bends the trunk laterally (sideways bending), while bilateral contraction raises the trunk from its supine position. (sitting up)
It forms part of a group of muscles called the hip flexors, whose action is to lift the upper leg towards the body when the body is fixed.
A tight psoas can result in a lack of mobility, and in chronic cases spasms or lower back pain by compressing the lumbar discs. When inflamed it can lead to irritation and entrapment of certain nerves, resulting in a sensation of heat running down the front of the thigh.
Below are two stretches that focus on stretching the upper and lower part of the Psoas.
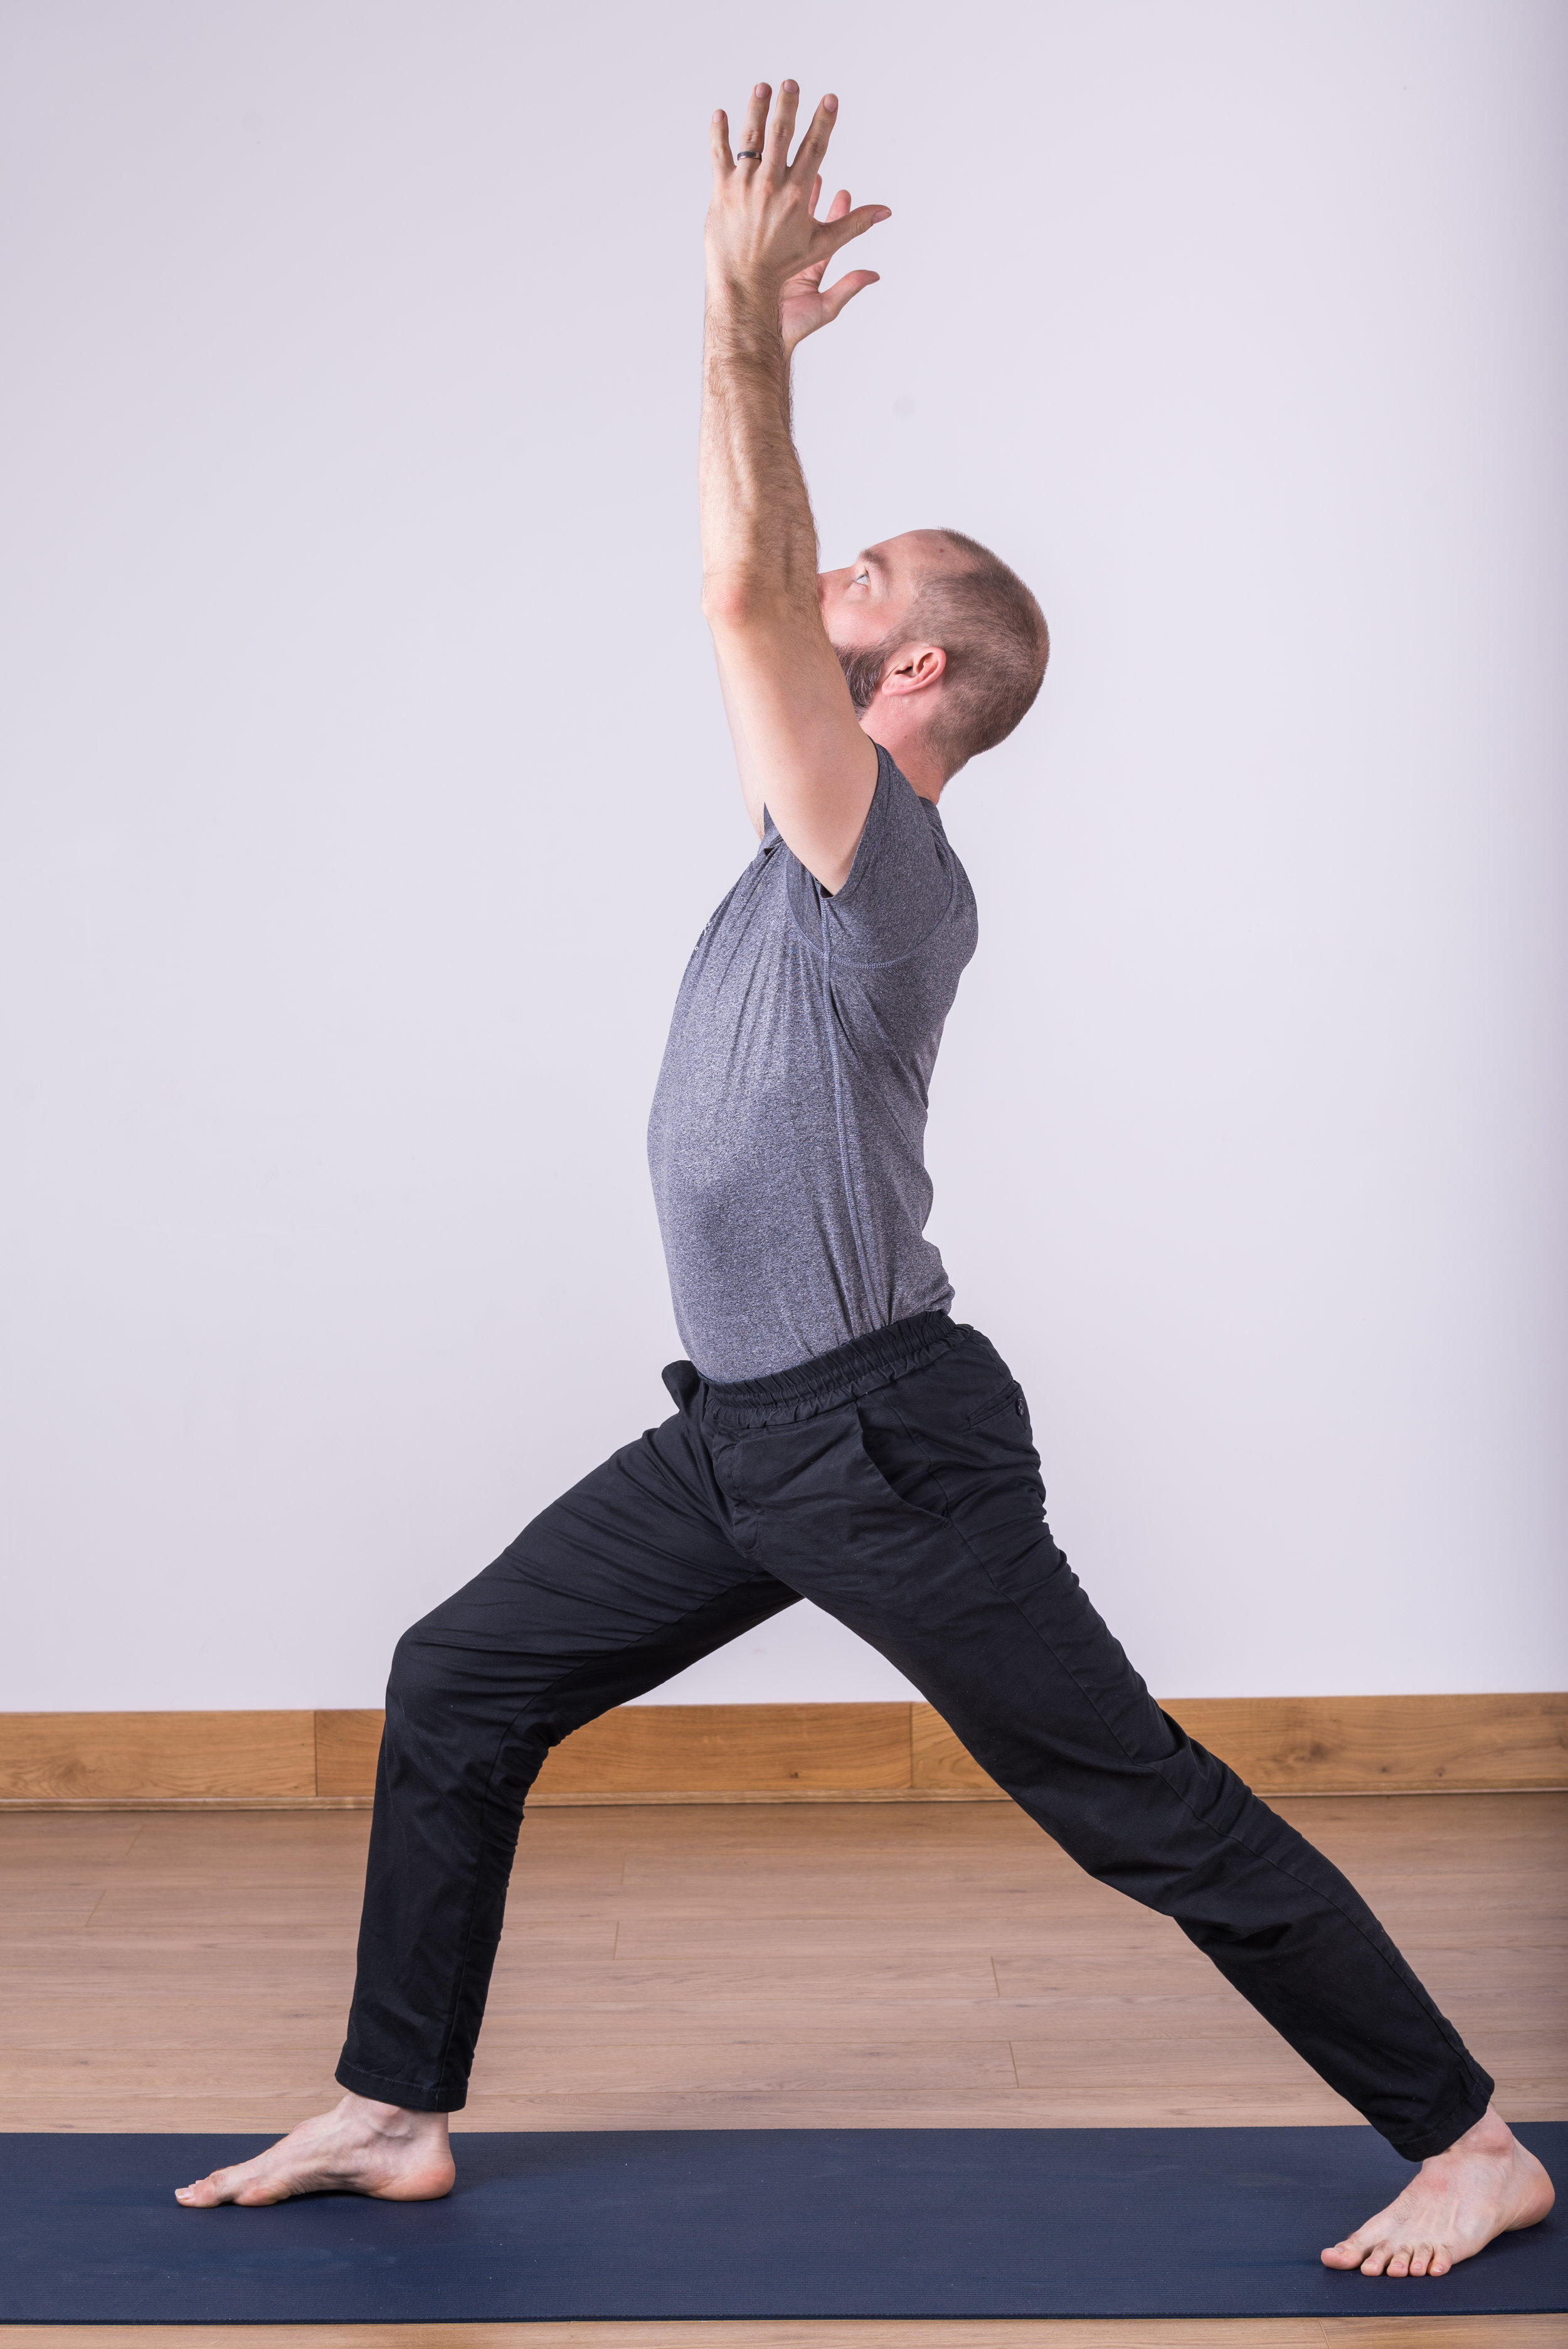
Warrior 1
Start standing with your feet hip distance apart second and third toes facing forward.
Take a long step back with the right leg, maintaining the hip distance apart alignment.
Take lunge in the front left leg, aligning the knee over the ankle.
Ground the right foot to 2 o’clock on the clock face making sure that little toe side is pressed to the floor. Keep muscular energy in the feet, imagine them drawing together.
Have your hands on your hips, as you square the hips to the front - drawing the right hip forward.
If comfortable, lift the hands to the ceiling stretching the chest, and tilt the lower part of the hips forward and the upper part backwards.
Ensure you keep strength and stability in the Glutes and Lower Back.
Hold for five breaths. Repeat on the other side.
High Lunge - with Side Bend
Set up in the same way. Start standing with your feet hip distance apart second and third toes facing forward.
Take a long step back with the right leg, maintaining the hip distance apart alignment.
This time stay up on the back toes, pressing the heel towards the floor and lengthening the back leg.
Again, lunge in the front left leg, aligning the knee over the ankle.
Have your hands on your hips, as you square the hips to the front - drawing the right hip forward.
Raise the hands above your head and interlace the fingers, then maintaining stability in the core, stretch up and over to the left-hand side.
This sideways movement of the back mobilises the upper part of the psoas where it connects to the spine.
Thanks for reading, please feel free to get in touch with any queries or questions, and I wish you good hip health. :-)


